Being a spoiled Windows guy since Windows 3.1, I have always maintained a severe dislike for modifying and configuring text files on desktop-less Linux systems. I cringe at the thought of using nano or vi to make changes to a file in Linux. I much prefer the elegance and sophistication of a more user-friendly or fully-featured text editor such as Notepad++ or Sublime Text.
These past few years I have been enchanted by Visual Studio Code. For those that don't use it yet, VS Code offers many of the same rapid development features as PyCharm or Sublime Text at less than a fraction of the cost (read as free). While still a wee bit rough around the edges, VS Code has quickly become my default editor for all text files.
A while back I thought if only I could remotely edit text files on *nix systems using VS Code. It didn't take much exploration and experimentation before I discovered that you can indeed accomplish exactly that..... with some caveats.
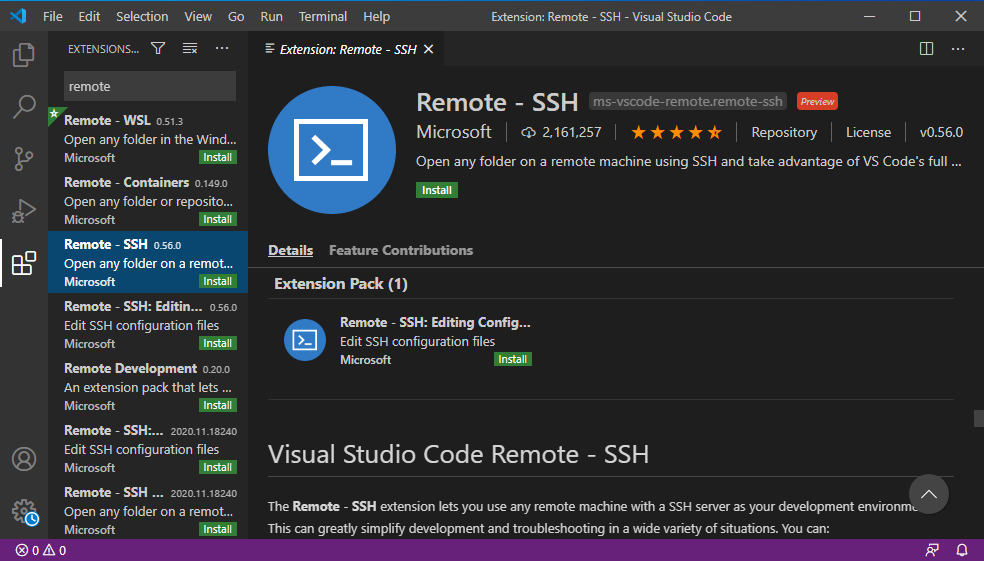
A quick Google search led me to an installable extension called Remote-SSH. After installing this extension and starting a connection to my Raspberry Pi using the command palette (ctrl+shift+p), I hit my first snag.
Things you will need
- A Windows 10 Computer
- WSL2 or OpenSSH
- Visual Studio Code
The Process
Installing Remote-SSH in VS code is very easy. Click on the extension icon or use ctrl+shift+x. Once in the extension window just type remote in the search and it will quickly appear. Click install and a few seconds later it's done.
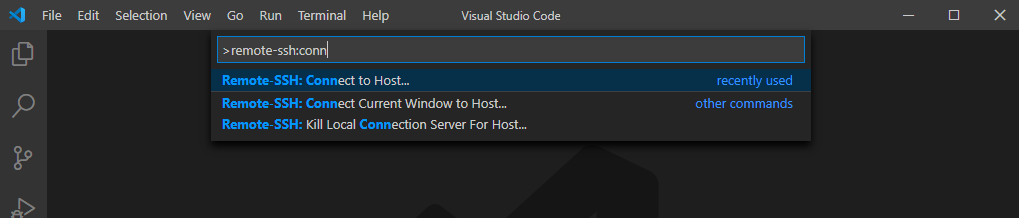
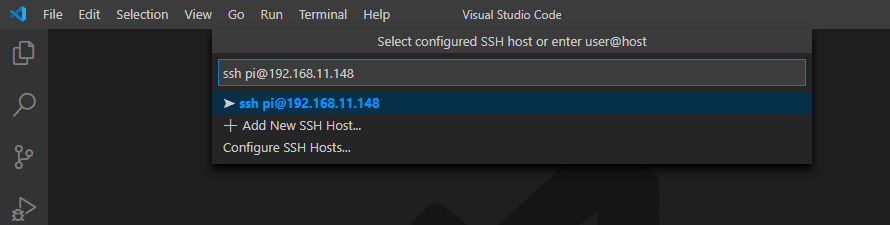
Remote-SSH uses ssh config files for storing connection information. To initiate a new connection type ctrl+shift+p to open the command palette then type in remote-ssh. All the various remote-ssh choices will appear. Choose Connect to Host.
If the Linux system you are wishing to connect to allows for password authentication, it's as easy as typing ssh uname@host and hitting enter. There are options for setting up pem key authorization but that's for another article.
In the next step, you need to stipulate the type of OS you are connecting to, Windows, Linux, or Mac. As I am running Raspberry Pi OS Lite, I chose Linux.

This is where I hit my first snag. My first time running this was several months back in an earlier version of Remote-SSH. This platform option did not exist during the initial connection and I had to go to VS Code settings, search for Remote Platform, then manually enter the hostname and platform (i.e. Linux) before I was able to connect.
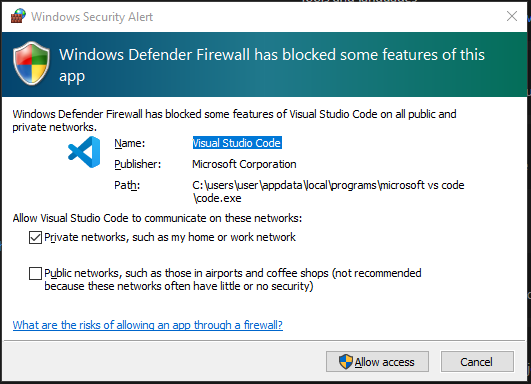
From here a Windows security alert appeared giving me the option to create a firewall exception for VS Code. Click Allow Access.
It will ask you for your password and voila! You are connected to your Linux system. So what all can we do?
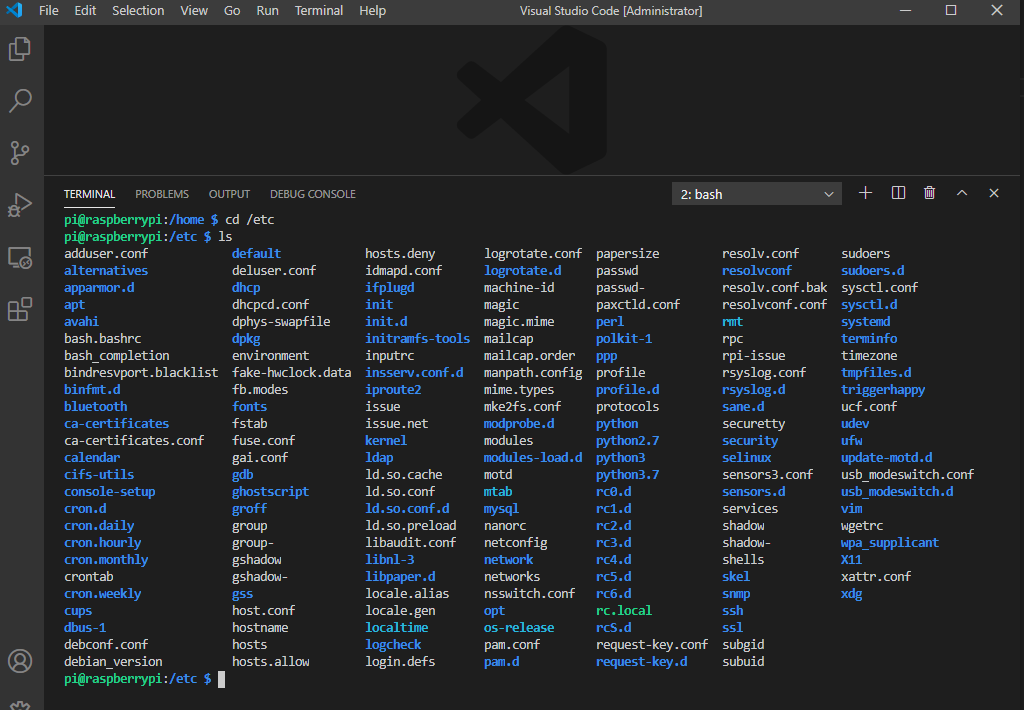
If you open a terminal ctrl_shift+`, that terminal will be connected to your Linux system.
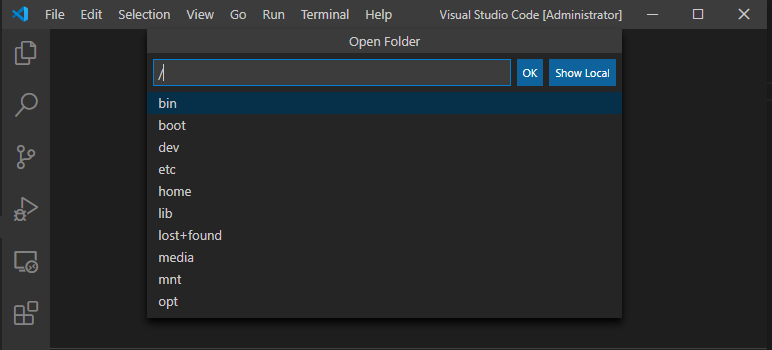
If you click file open folder, you will be able to browse the remote Linux directory.
Snag number 2 Each time you open a new folder, Remote-SSH re-connects to the Linux system causing it to require you to reenter your password. While annoying, this can easily be remedied by using pem key authorization rather than password authorization.
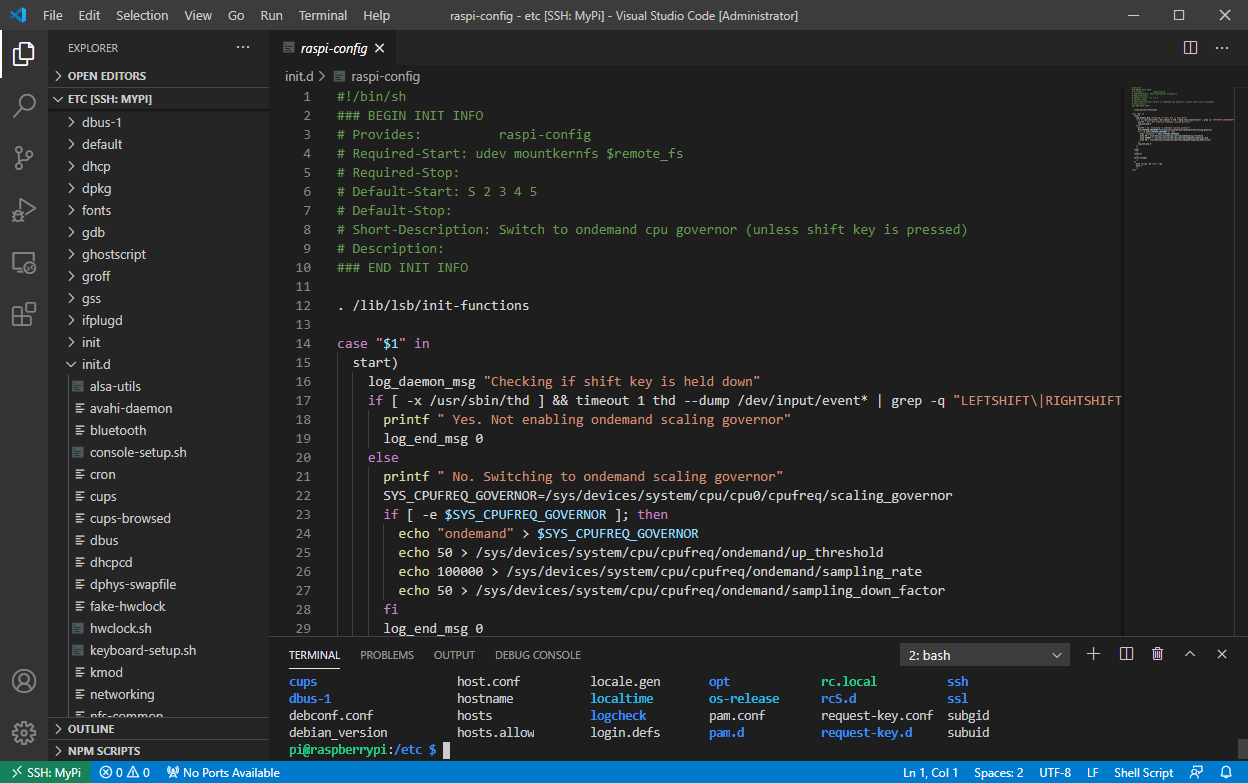
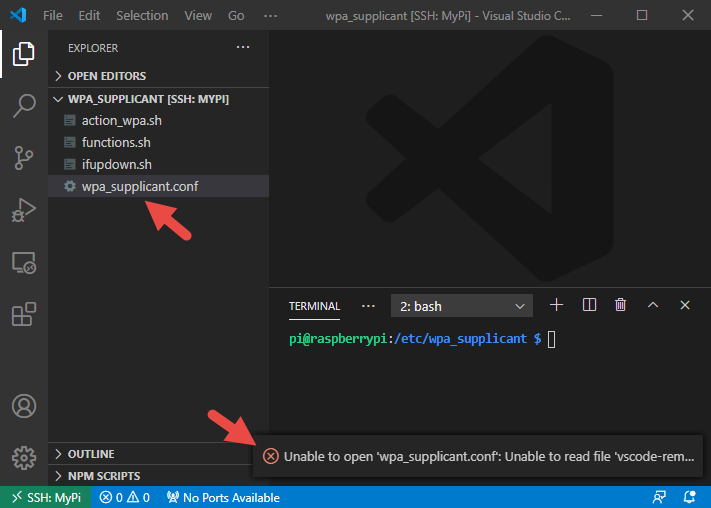
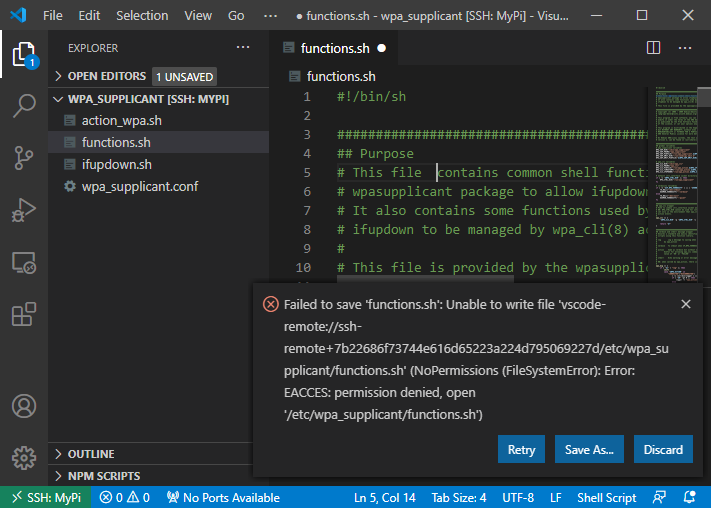
Snag number 3 After selecting a folder, you will be presented with VS Code's normal file view. For this demonstration, I chose the wpa supplicant folder. You will see that after selecting the wpa_supplicant.conf file I received an error message. This is due to my user 'pi' not having read rights to this file.
In a regular Linux terminal, we would of course type sudo nano wpa_supplicant.conf, which would get us around this issue. With VS Code, there is no way to natively elevate permissions. You can sudo in the terminal but not in the GUI. The same is true for files you have read access to but not write access. You will be able to view them, but you will not be able to save changes.
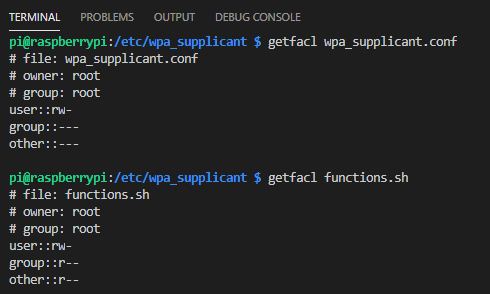
There are several solutions to this but the one I settled on is setfacl. setfacl allows you to specify which users or system processes are granted access to various objects. You can view the current permissions with getfacl.
In the example used, you can see the difference between the wpa_supplicant.conf file I could not read, and the functions.sh file I could read but not write.
So on a file by file basis, you could
sudo setfacl -m u:pi:rw /etc/wpa_supplicant/wpa_supplicant.conf
which is going to change the permissions to
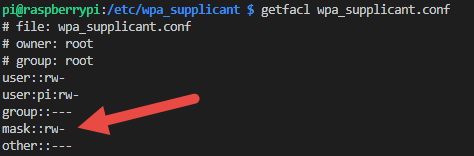
Or you could recursively apply these permissions to the entire folder, subfolders, and files with
sudo setfacl -R -m u:pi:rwx /etc/wpa_supplicant/*
But wait you say, for security reasons I don't want my user to have write and execute rights to that folder forever! When you are done, you can recursively remove the rights you just granted.
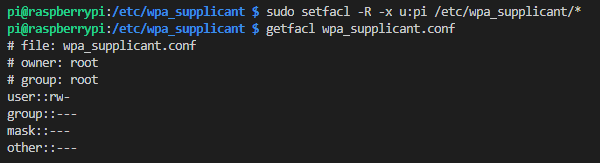
sudo setfacl -R -x u:pi /etc/wpa_supplicant/*
This returns the rwx rights to their proper settings.
And there you have it. You can now remotely administer your Linux machines without the pain and anguish of using nano or vi.
All due respect where it belongs though, both nano and vi are extremely powerful and I have seen users comfortable with them whip through config changes faster than I can with VS Code or Notepadd++.